


aquatherm ti-socket: Assembly Part 1
1. Casing preparation
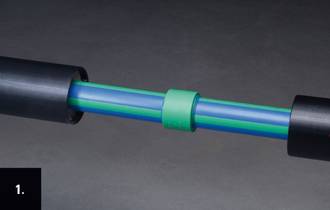
1.1 Before connecting the medium pipe and the socket by socket welding respectively by butt-welding, the shrink sleeve must be pulled over one of the both pipe ends. The white protective foil must not be removed yet! During the welding of the medium pipe the shrink sleeve must be protected from burning.
1.2 Dry and clean the whole socket area and all sealing areas from loose impurities with a propane torch and a dry grease and lint-free rag.
1.3 Remove any wet PUR foam from the end of the pre-insulated pipe. The cut should be made with a suitable saw – planar-vertical as possible – to ease the later adjustment of the insulation half shells.
1.4 Remove any burrs and dirt from all sealing areas with a triangular scraper or a concave rasp.
1. Casing preparation
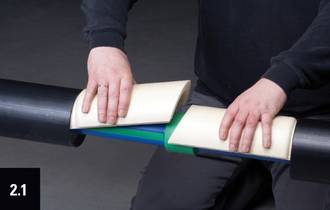
2.1 Each with number 1 and 2 marked insulation half-shells is mutually pushed into the cavity at the face sides of the casing pipes. Then they are joined parallel in direction of the medium pipe and turned to the bottom side of the medium pipe.
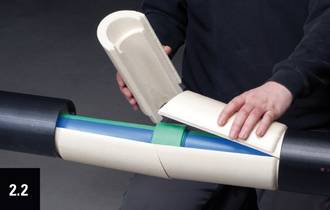
2.2 Now the other both insulation half-shells marked with number 1 and 2 are inserted as described under 2.1. The key and slot joint of all elements allows a gap-free and custom-fit joining of all shell-elements.
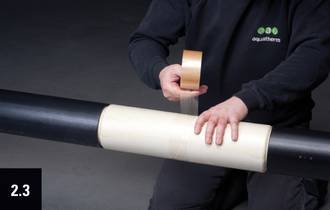
2.3 An additional fixing of the insulation half-shells is made by a customary adhesive tape in the middle. Clean the surface of all sealing areas with a rag to remove dirt and degrease the areas with ethanol (min. 99,9 %) by using a grease and lint-free rag.
3. Marking of shrink sleeve position
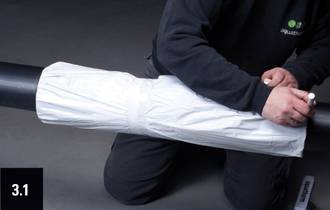
3.1 For determination of the same overlap on both sides of the casing pipes, the shrink sleeve must be pushed to one end of the casing pipe. Then the end of the shrink sleeve is marked on the other side of the casing pipe.
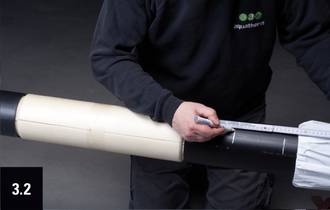
3.2 Push back the shrink sleeve so far in direction of the starting position that the marking of step 3.1 becomes visible. Meter the distance between marking and leading edge of the casing pipe and mark center distance.
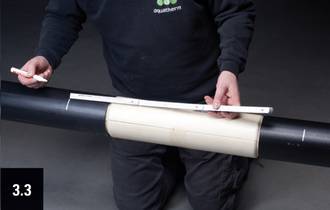
3.3 Pass the dimension of center distance on the casing pipe on the opposite side and mark it also
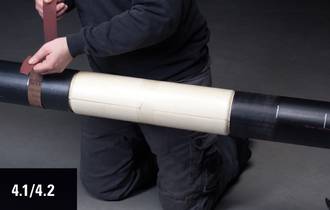
4.1 Roughen the surface of the casing pipe end complete circumferentially up to the marking by using sandpaper (40 to 60 grade).
4.2 Repeat the working process of step 4.1 also at the other end of the casing pipe.
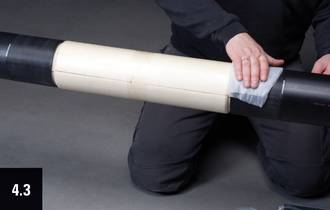
4.3 Use a dry, grease and lint-free rag with ethanol/spirit (min. 99,9 %) or Tangit cleaning wipes to clean the roughened surface of the casing pipe ends.