


aquatherm ti-socket: Assembly Part 2

5. Assembly of melting adhesive strips
5.1 Heat the cleaned pipe end with a low flame on each side of the pipe up to approximately 80 °C.
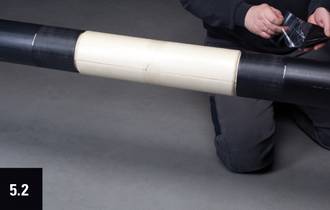
5.2 Remove the thinner release liner at the underlap of the melting adhesive strip.
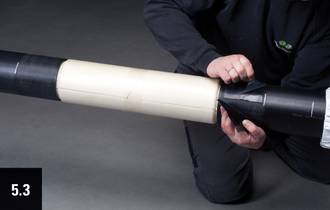
5.3 Attach the melting adhesive strip at the end of the casing pipe in a distance of approx. 30 mm to the marking of the center distance in a 90 °C angle to the pipe axis and wrap around closely.
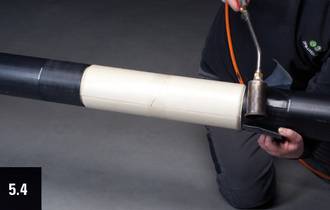
5.4 Remove the thick release liner on the top side of the melting adhesive strip only in the overlapping area at the beginning of the melting adhesive strip. Gently heat the end of the melting adhesive strip at the bottom side. Then tightly wrap the heated film around the pipe and press it close in the overlapping area.
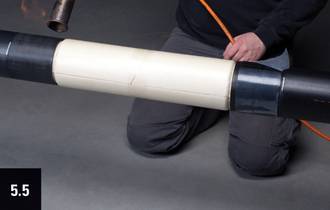
5.5 Repeat the described work process of step 5.1 to 5.4 at the other end of the casing pipe.
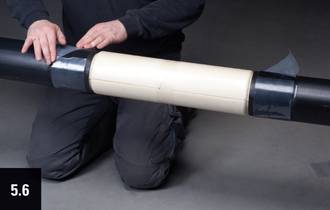
5.6 Wrap outwards the upper release liner on both sides in a 45 ° angle that the beginning of the film of both melting adhesive strips protrudes over the marking of the center distance.
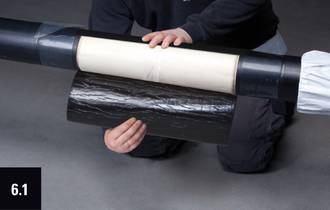
6. Assembly of casing shrink film
6.1 Remove the release liner at the bottom of the casing shrink film. Center the film over the PUR- insulation sleeve in a 90 °C angle to the pipe axis and wrap closely around the PUR –insulation sleeves. A sufficient overlap of the shrink film of at least 10 cm is important. On both ends the shrink film must overlap the casing pipes with at least 2.5 cm.
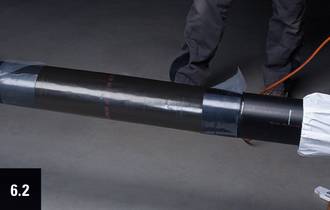
6.2 Gently heat the end of the shrink film at the bottom side – like the melting adhesive strips. Then wrap the heated part around the pipe and press it tight in the overlap area.