


aquatherm ti-socket: Assembly Part 3

7.1 Push the shrink sleeve as far to the marking of the center distance on the other side of the casing pipe until the marking is visible on both sides of the center distance.

7.2 Cut the release liner with a knife from the outside in a way that the release liner in the inside of the shrink sleeve can also be pulled out from one side.
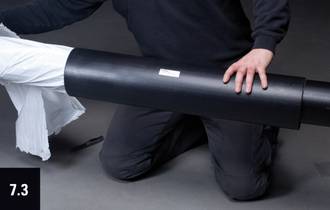
7.3 Pull out the release liner from one side and remove it completely. Position the shrink sleeve in a way that the quality-control number is in the area between “10 and 14 o´clock position”.
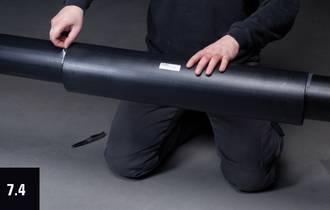
7.4 Pull off the release liner of the melting adhesive strip and remove it.
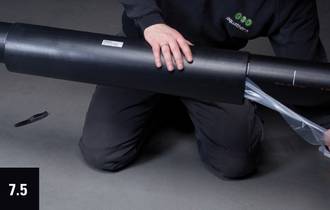
7.5 Pull off the release liner of the melting adhesive strip on the other side and remove it. Check the position of the shrink sleeve according to the markings of the center distance on both sides of the casing pipes.
8. Shrinking sequence
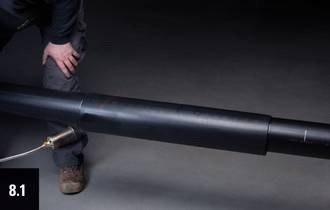
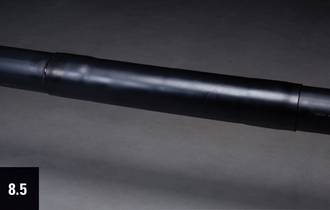
8.1 – 8.5 Check the position of the shrink sleeve and the cleanliness in the whole processing area again.
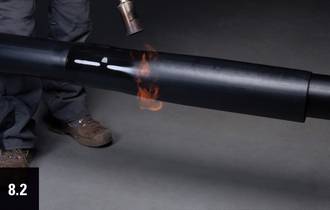
For the processing of the ISO-socket of dimension 315 mm and higher it is advisable for economic and mounting reasons to work with two assemblers and two propane gas torches.
The shrinking process starts at one side of the shrink sleeve. Consider that the shrink sleeve is heated up with a weak propane gas flame (see page 39). The burner head must be swayed slowly around the pipe. Especially regard the area between “5 and 7 o-clock position”.
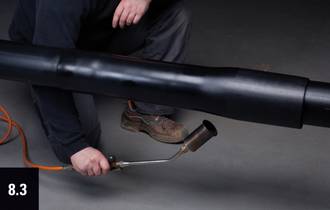
The shrinking process must be continued by controlled, spiral forward motions of the burner head around the pipe –form a funnel to avoid air bubbles – and is completed at the other end of the shrink sleeve.
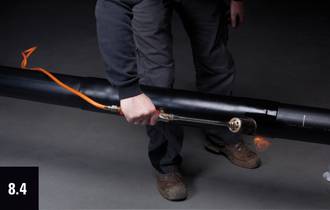
Quality control – “finger test”
During the shrinking process check the “weakness” of the shrink sleeve base and the liquefaction of the hot-melt adhesive in the sealing area by a “finger test”. Still existing cold zones can be reheated without any difficulty.
When the shrink sleeve lays evenly tight and without gaps completely around the PUR-insulation jacket respectively around the casing pipes the shrinking process can be finished.